
Welcome to the Oil-Less Turkey Fryer Manual! This guide helps you understand and safely use your fryer for delicious meals. Follow the instructions carefully.
Overview of Oil-Less Turkey Fryer Technology
The Oil-Less Turkey Fryer uses advanced infrared technology to cook turkeys without oil, ensuring crispy results with less mess and healthier outcomes. This method relies on circulating hot air to evenly distribute heat, eliminating the need for oil while maintaining flavor. The TRU-Infrared system, found in models like the Char-Broil Big Easy, prevents flare-ups and promotes consistent cooking. This technology is designed for safety and efficiency, allowing users to achieve restaurant-quality meals at home. The oil-free design makes it a convenient and innovative alternative to traditional deep-frying methods.
Importance of Following the Manual
Following the Oil-Less Turkey Fryer manual is crucial for safe and efficient operation. It provides essential safety precautions, assembly instructions, and cooking guidelines to prevent accidents and ensure optimal performance. Neglecting the manual can lead to electrical hazards, improper assembly, or unsafe cooking practices. The manual also includes troubleshooting tips and maintenance advice to extend the fryer’s lifespan. By adhering to the instructions, users can achieve perfectly cooked turkeys while minimizing risks. Always refer to the manual before use to ensure a safe and satisfying cooking experience.

Safety Precautions and Warnings
Always follow the safety guidelines to avoid accidents. Ensure the fryer is fully assembled and placed on a stable, heat-resistant surface. Keep children and pets away during operation. Never use the fryer near flammable materials or during electrical storms. Avoid touching hot surfaces and use protective gloves when handling components. Properly disconnect the power supply before cleaning or maintenance to prevent electrical hazards. Adhere to all warnings to ensure safe and effective cooking.
Understanding Safety Symbols
The manual uses specific safety symbols to alert you to potential hazards. The warning triangle with an exclamation mark indicates important safety information. A fire hazard symbol signals flammable situations, while an electrical warning highlights risks of shock. These symbols are crucial for safe operation. Always look for them in the manual and on the appliance. Understanding these symbols helps prevent accidents and ensures proper usage. Familiarize yourself with each symbol before assembly or cooking. Your safety is a top priority, so never ignore these warnings. They are designed to protect you and ensure a safe cooking experience.
Electrical Safety Guidelines
Always use a grounded electrical outlet approved for your fryer’s power requirements. Never operate the fryer near water or in wet conditions. Avoid using it during electrical storms or power surges. Ensure the cord is undamaged and kept away from heat sources. Do not overload circuits, as this can cause electrical hazards. Unplug the fryer when not in use or before cleaning. Never touch electrical components with wet hands. Adhere to these guidelines to prevent shocks or fires, ensuring a safe cooking experience. Proper electrical connections are vital for safe and efficient operation of your oil-less turkey fryer.
Proper Handling and Usage
Always handle the fryer with care, especially when it’s in operation. Use heat-resistant gloves to avoid burns when touching the exterior or moving parts. Ensure the fryer is placed on a stable, level surface away from flammable materials. Never leave the fryer unattended while cooking, as this can lead to accidents. Follow the recommended temperature settings and cooking times to achieve optimal results. Avoid overcrowding the basket, as this can affect air circulation and cooking performance. Regularly inspect the fryer for damage or wear and tear, addressing any issues promptly to maintain safety and efficiency. Proper handling ensures a safe and successful cooking experience with your oil-less turkey fryer.

Assembly Instructions
Assemble your oil-less turkey fryer by following the step-by-step guide. Most parts come pre-assembled. Ensure all components fit securely and review safety guidelines before use.
Step-by-Step Assembly Guide
Begin by unpacking and verifying all components. Attach the legs to the fryer base securely. Next, connect the burner assembly to the main unit, ensuring it clicks into place. Attach the control panel and valve, aligning the propane inlet properly. Connect the LP cylinder to the regulator, tightening firmly. Plug the power cord into a grounded outlet. Finally, test all connections for leaks and ensure proper function before first use. Follow the manual closely for precise assembly and safety.
Tools and Parts Required
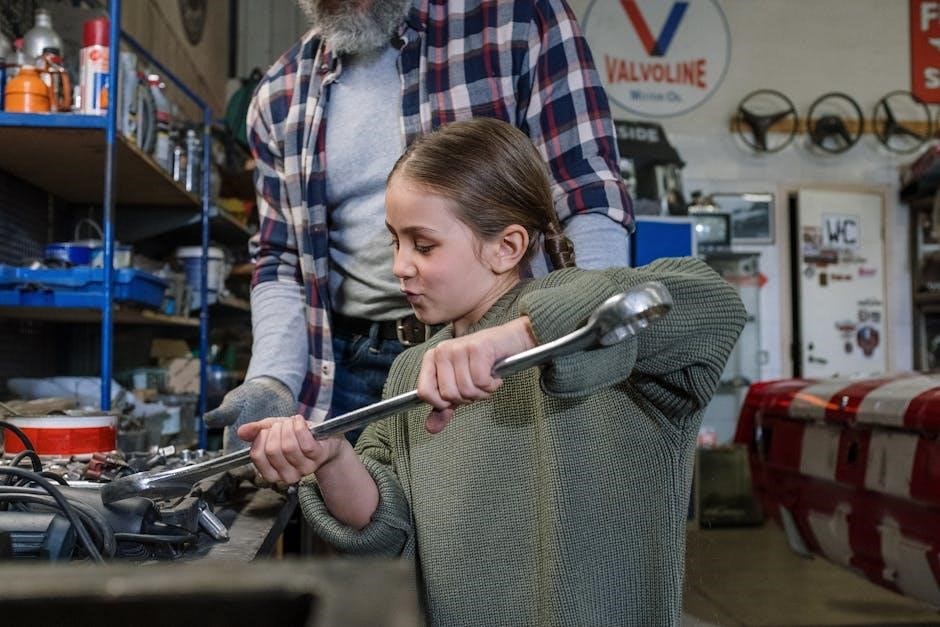
To assemble your oil-less turkey fryer, you’ll need a few essential tools and components. The main parts include the fryer base, burner assembly, control panel, LP cylinder connector, and the turkey basket. Tools required are a wrench for tightening connections, a screwdriver for securing parts, and an Allen wrench for adjusting components. Additional items like oven mitts and a gas leak detector are recommended for safety. Ensure all parts are included and undamaged before starting assembly. Refer to the manual for a detailed list of components and tools to avoid missing anything crucial.
Completing the Final Assembly Checks

After assembling your oil-less turkey fryer, perform a final inspection to ensure all parts are correctly fitted. Check that the burner, control panel, and LP cylinder connection are secure. Verify that the turkey basket and rack are properly aligned and attached. Test the burner by lighting it to confirm proper ignition and flame consistency. Ensure all electrical connections are safe and grounded. Finally, review the assembly checklist in your manual to confirm every step is completed. This process ensures your fryer is ready for safe and efficient cooking, helping you achieve perfectly cooked turkey every time.

Turkey Preparation and Cooking
Thaw the turkey completely before cooking. Season as desired, then place it in the fryer basket. Set the temperature and timer according to the manual for perfect results.
Preparing the Turkey for Cooking
Thaw the turkey completely before cooking to ensure even heating. Pat dry with paper towels to remove excess moisture. Season generously with your favorite spices or marinades. Ensure the turkey fits securely in the fryer basket, leaving space for air circulation. Avoid stuffing the turkey inside the cavity for safety. For optimal results, let the turkey sit at room temperature for 30 minutes before cooking. Follow the manual’s guidelines for size and preparation to achieve the best flavor and texture.
Cooking Temperatures and Times
Preheat the oil-less turkey fryer to 400°F (200°C) before cooking. For whole turkeys, cook at 300-325°F (150-165°C) for 10-15 minutes per pound. Use a meat thermometer to ensure the internal temperature reaches 165°F (75°C). Larger turkeys may require longer cooking times. Avoid opening the lid too frequently to maintain consistent heat. Follow the fryer’s temperature chart for precise guidance. Always let the turkey rest for 10-15 minutes before carving to retain juices and ensure safety. Monitor the cooking process closely to avoid overcooking and achieve perfect results every time.
Using the Basket and Rack Effectively
Place the turkey securely in the basket, ensuring proper air circulation for even cooking. Adjust the rack to accommodate the turkey’s size, leaving space for heat distribution. Pat the turkey dry before placing it in the basket to enhance crisping. Avoid overcrowding the basket for consistent results. Secure the turkey firmly on the rack to prevent movement during cooking. For optimal performance, preheat the fryer before adding the turkey. Regularly clean the basket and rack to maintain hygiene and functionality. Proper use ensures delicious, evenly cooked meals every time.

Maintenance and Cleaning
Regularly clean the fryer components with a soft cloth and mild detergent. Avoid abrasive materials to prevent damage. Allow the unit to cool before disassembling for cleaning. Ensure all parts are dry before storage to prevent rust. Proper maintenance extends the fryer’s lifespan and ensures safe, efficient operation. Always follow the manual’s cleaning guidelines for optimal performance and hygiene.
Post-Cooking Cooling and Disassembly
After cooking, turn off the fryer and unplug it from the power source. Allow the unit to cool completely before handling any components. This prevents burns and ensures safety. Once cooled, carefully disassemble the parts, such as the basket, rack, and lid, for cleaning. Use a soft cloth to wipe down exterior surfaces. Avoid using abrasive cleaners or scourers, as they may damage the finish. Proper cooling and disassembly are crucial for maintaining your oil-less turkey fryer’s performance and longevity. Always follow the manual’s specific instructions for disassembly to ensure all parts are handled correctly.
Cleaning the Fryer Components
After cooking, unplug the oil-less turkey fryer and let it cool completely to avoid burns. Remove the basket, rack, and lid, following the manual’s disassembly instructions; Wash these parts with warm soapy water and a soft sponge to prevent scratching. For stubborn food residue, soak them in hot water before scrubbing gently. Avoid abrasive cleaners or scrubbers to protect the finish. Rinse thoroughly and dry with a clean towel to prevent water spots. For the exterior, use a damp cloth and avoid getting electrical parts wet. Use recommended cleaning solutions for the exterior, following the manual’s guidelines. Clean all crevices with a soft brush to remove trapped food particles. Reassemble only when all parts are dry to prevent moisture issues. Store the fryer in a dry place, possibly covered, to keep it dust-free and ready for future use;
Storage and Long-Term Maintenance
After cleaning, ensure all components are completely dry before storing. Store the oil-less turkey fryer in a cool, dry place away from direct sunlight. Use a breathable cover to protect it from dust. Avoid stacking heavy items on the fryer to prevent damage. Check the fryer for any signs of wear or damage before storing. Lubricate moving parts if necessary to maintain functionality. For long-term storage, consider disassembling and storing components separately in labeled containers. Always refer to the manual for specific storage recommendations to ensure longevity and optimal performance.

Troubleshooting Common Issues
Identify and resolve issues like uneven cooking or fryer malfunction. Check electrical connections, ensure proper propane flow, and verify valve alignment. Refer to the manual for detailed solutions.
Identifying and Resolving Electrical Problems
Common electrical issues include the fryer not turning on or malfunctioning during operation. First, ensure the unit is properly plugged into a grounded outlet. Check for loose connections or tripped circuit breakers. Avoid using the fryer during electrical storms. If the indicator light doesn’t work, verify the power supply and connections. For persistent issues, unplug the fryer and inspect the cord for damage. Consult the manual or contact a professional if problems persist. Always prioritize safety when troubleshooting electrical components to avoid hazards.
Adjusting the Valve and Control Panel
To ensure proper function, adjust the valve and control panel as needed. Loosen the control panel slightly and ensure the valve is centered at the top. Tighten securely after adjustment. If issues arise, turn off the control knob and disconnect the LP cylinder coupling nut. Reconnect and retry. Proper alignment ensures even heating and prevents gas leaks. Always refer to the manual for specific instructions. Regular adjustments maintain optimal performance and safety. If problems persist, consult a professional for assistance.
Reconnecting the LP Cylinder
To reconnect the LP cylinder, first ensure the fryer is turned off. Locate the coupling nut on the LP cylinder connection. Turn off the control knob and disconnect the nut by loosening it. Once disconnected, align the cylinder properly and tighten the nut securely. After reconnecting, check for gas leaks using soapy water. If bubbles form, tighten the connection further. If issues persist, turn off the fryer and retry the process. Always ensure the valve is centered and aligned correctly for proper function. If problems continue, consult a professional for assistance.