Welcome to your Nikon D5100 Owner’s Manual, a comprehensive guide designed to help you master your camera. This manual provides detailed explanations of features, settings, and functions to enhance your photography experience. Nikon D5100 offers advanced capabilities, and this guide ensures you unlock its full potential. Keep it handy for quick reference and troubleshooting.
1.1 Overview of the Nikon D5100 Camera
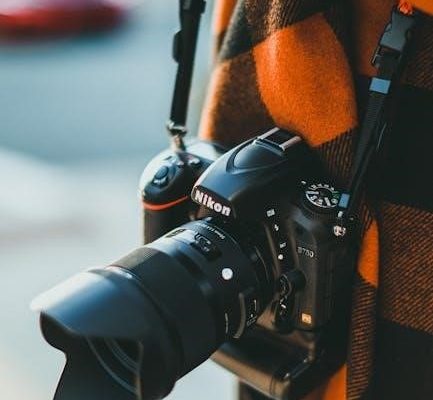
The Nikon D5100 is a versatile and feature-rich DSLR camera designed for photographers of all skill levels. It boasts a 16.2-megapixel APS-C sensor, delivering high-quality images with excellent detail and color accuracy. The camera features a 3-inch swivel LCD screen, ideal for composing shots from unique angles. With advanced autofocus, manual controls, and a range of creative modes, the D5100 offers flexibility and precision. Whether you’re capturing landscapes, portraits, or action shots, this camera provides the tools to achieve professional-grade results. Its compact design and intuitive interface make it a great choice for both beginners and experienced photographers.
1;2 Key Features and Benefits of the Nikon D5100
The Nikon D5100 is a feature-rich DSLR camera offering a 16.2-megapixel CMOS sensor for stunning image quality. It supports 1080p HD video recording and features an 11-point autofocus system for sharp captures. The 3-inch swivel LCD screen provides flexibility in framing shots. With ISO sensitivity up to 6400, it excels in low-light conditions. The camera also includes built-in HDR and Active D-Lighting for enhanced dynamic range. These features make it ideal for capturing detailed photos and videos, whether you’re shooting landscapes, portraits, or action scenes; Its versatility and performance cater to both enthusiasts and professionals.

Getting Started with Your Nikon D5100
Welcome to your Nikon D5100! This section guides you through the initial steps to ensure a smooth and efficient experience with your camera.

2.1 Unboxing and Initial Setup
Unboxing your Nikon D5100 is an exciting first step. Carefully unpack the camera, ensuring all accessories are included, such as the battery, charger, and memory card. Inspect the camera for any damage and familiarize yourself with its exterior. Before use, charge the battery fully and insert a memory card. Power on the camera to initialize the setup process. This section will guide you through the essential steps to prepare your camera for its first use, ensuring a smooth and enjoyable photography experience.
2.2 Charging the Battery and Inserting the Memory Card
Before using your Nikon D5100, charge the battery using the provided MH-24 charger. Avoid using third-party chargers to prevent damage. The charging time is approximately 2 hours. Once charged, insert the battery into the camera’s compartment, located at the bottom. For the memory card, use an SD, SDHC, or SDXC card. Open the memory card slot on the right side, insert the card facing the correct direction, and gently push until it clicks. Format the card in the camera for optimal performance.
2.3 Basic Camera Controls and Layout
The Nikon D5100 features an intuitive design with controls strategically placed for easy access. The mode dial on top allows you to switch between shooting modes. The command dial adjusts settings like aperture and shutter speed. The release mode button enables burst or quiet shooting. The multi-selector navigates menus and selects autofocus points. The live view button toggles between viewfinder and LCD modes. Familiarize yourself with the LCD monitor and viewfinder for composing shots and reviewing settings. Explore these controls to optimize your photography workflow.
Understanding the Shooting Modes
Discover how to capture stunning images with the Nikon D5100’s shooting modes. Learn about Auto, P, S, A, M, and Scene modes to master various photography needs.
3.1 Exploring the Mode Dial and Its Options
The Nikon D5100’s mode dial provides easy access to various shooting modes. Located on top, it offers Auto, P (Program), S (Shutter Priority), A (Aperture Priority), and M (Manual) modes. Additionally, it includes Scene modes like Portrait, Landscape, Child, and Sports for tailored results. Each mode is designed to simplify or enhance control over settings like aperture, shutter speed, and ISO. Familiarize yourself with the dial to quickly switch modes and optimize your photography based on the situation. Experimenting with these options will help you master different shooting scenarios and improve your creative output.
3.2 Mastering the Exposure Modes (P, S, A, M)
The Nikon D5100 offers four exposure modes: Program Auto (P), Shutter Priority (S), Aperture Priority (A), and Manual (M). In P mode, the camera controls aperture and shutter speed, but you can adjust settings like ISO. S mode lets you set the shutter speed, ideal for freezing or blurring motion. A mode allows you to control aperture for depth of field. M mode gives full manual control over both aperture and shutter speed for precise results. These modes offer flexibility, catering to different photography needs and skill levels.
3.3 Using Scene Modes for Specific Photography Needs
Scene modes on the Nikon D5100 are designed to optimize camera settings for specific photography scenarios. Portrait mode focuses on your subject with a blurred background, while Landscape mode ensures sharpness across the entire image. Close-up mode enhances details in small objects, and Sports mode captures fast-moving subjects with faster shutter speeds. Night Portrait mode balances low-light portraits with background detail. These modes simplify photography by automatically adjusting settings like aperture, shutter speed, and ISO, allowing you to focus on composition and creativity. Experiment with different modes to achieve desired results in various lighting conditions and subjects.

Customizing Your Nikon D5100
Welcome to the Nikon D5100 Owner’s Manual. This guide helps you customize and optimize your camera for enhanced photography. Discover how to tailor settings to your needs.
4.1 Navigating the Menu System
Navigating the Nikon D5100’s menu system is straightforward, allowing you to access and customize various settings. Use the multi-selector to scroll through options and press OK to select. The menu is divided into sections, such as Shooting, Setup, Retouch, and My Menu. Customize your experience by organizing frequently used settings in My Menu. This feature ensures quick access to your preferred options, enhancing efficiency during shoots. The menu system is intuitive, making it easy to tailor the camera to your photography style and needs.

4.2 Customizing Buttons and Controls
The Nikon D5100 allows you to customize its buttons and controls to suit your shooting style. The Fn (Function) button can be assigned to frequently used settings like ISO, white balance, or bracketing. Use the menu system to reassign functions to other buttons, such as the AE-L/AF-L button, for easier access. This feature enhances efficiency and comfort during photography sessions. Customize your controls to streamline your workflow and make shooting more intuitive. Tailor the camera to your preferences for a personalized experience.

4.3 Setting Up the Autofocus System
The Nikon D5100 offers a versatile autofocus system that can be tailored to your needs. Use the menu to select from modes like AF-A (auto), AF-C (continuous), or AF-S (single servo) depending on your subject. Choose from 11 focus points or use dynamic-area AF for moving subjects. The 3D tracking mode is ideal for unpredictable motion. Adjust the AF-area mode to suit your scene, such as single-point AF for precise focus or auto-area AF for automatic subject detection. Customize these settings to optimize autofocus performance for your photography style and scene requirements.
Advanced Features and Functions
Discover advanced features like Scene Modes and Picture Controls to refine your techniques and enhance creativity. Explore these tools to elevate your photography experience.
5.1 Using Live View for Precise Composition
Live View on the Nikon D5100 allows for precise composition by displaying a real-time preview of your scene on the LCD monitor. Activate it using the Lv button for enhanced control over framing and focus. Use the zoom-in feature to check focus accuracy, ensuring sharpness in your images. This mode is particularly useful for macro, portrait, and still-life photography. Experiment with different angles and compositions to capture stunning results with greater precision and creativity.
5.2 Capturing Stunning Photos with HDR
High Dynamic Range (HDR) enhances your photos by capturing a wider range of tonal values. The Nikon D5100 allows you to shoot HDR images by combining multiple exposures. Activate HDR mode via the Shooting menu and select the desired exposure difference; The camera will take two shots and combine them into one image with rich colors and contrast. This feature is ideal for high-contrast scenes, such as landscapes or backlit subjects, ensuring details in both bright and dark areas are preserved for a more natural look.

5.3 Enhancing Your Photography with Bracketing
Bracketing on the Nikon D5100 allows you to capture multiple shots at different exposures, ensuring optimal results in challenging lighting conditions. This feature is ideal for high-contrast scenes, such as landscapes or interiors. You can select up to three frames and adjust the exposure difference. Bracketed images can later be merged using HDR software for a more dynamic range. Activate bracketing via the Shooting menu, where you can choose the number of shots and exposure increments. This technique is perfect for capturing detailed shadows and highlights in a single scene.
Maintenance and Troubleshooting
Welcome to the Nikon D5100 Owner’s Manual. This section provides essential tips for maintaining your camera and resolving common issues to ensure optimal performance and longevity. Regular cleaning and firmware updates are vital. Troubleshoot issues like error messages or battery problems by referring to the manual. Proper care ensures your camera functions at its best for years to come. Keep this guide handy for quick solutions and maintenance advice.
6.1 Cleaning and Maintaining Your Camera
Regular cleaning and maintenance are crucial to ensure your Nikon D5100 functions optimally. Use a soft, dry cloth to wipe the camera body and lens. For the LCD screen, use a microfiber cloth to prevent scratches. Avoid harsh chemicals or excessive moisture. Store the camera in a cool, dry place to prevent mold and dust buildup. Clean the lens with a Nikon-approved cleaning solution and avoid touching the lens surface to minimize smudges. Proper care extends the lifespan of your equipment and ensures sharp, clear images.
6.2 Updating Firmware for Optimal Performance
Updating your Nikon D5100’s firmware ensures optimal performance, improved features, and bug fixes. Regularly check Nikon’s official website for the latest firmware version. Download the update to your computer, then transfer it to a memory card compatible with your camera. Insert the card into the camera and follow the on-screen instructions to complete the update. Always use a fully charged battery and avoid interrupting the process to prevent damage. Keeping your firmware up-to-date guarantees the best functionality and enhances your photography experience.
6.3 Common Issues and Solutions
Common issues with the Nikon D5100 include memory card errors, battery drain, or autofocus malfunctions. For memory card errors, format the card in-camera or replace it. If the battery drains quickly, ensure it’s fully charged and avoid using live view excessively. For autofocus issues, clean the lens and sensor, and reset autofocus settings. If problems persist, refer to the manual or contact Nikon support. Regular maintenance and updates often prevent these issues, ensuring smooth operation and optimal performance for your photography needs.